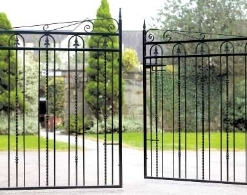


Fitted to the exterior of your property, metal gates are expected to serve a number of tasks including providing privacy and security from trespassers and passers-by combined with providing an aesthetically pleasing appearance that blends well with your homes architectural style.
Due to this and the fact they are exposed to whatever conditions the weather throws at them they can take a real battering over time and therefore start to deteriorate in condition if they are not maintained in the correct manner. This is because over time as the paintwork starts to chip and split, water will be able to penetrate onto the naked metal causing rust marks to appear that will eventually turn into not only an eyesore but will also weaken the gates overall condition.
With this in mind we have provided you with a handy guide that will show you the correct way of carrying out maintenance task with the minimal fuss so as to achieve professional result every time.
Maintaining Your Current Gates
If your current gates features paintwork that is in a poor condition and rusting has started to set in then it will be essential to carry out a complete overhaul of the gate itself. When doing this follow this simple process and you can`t go wrong.
- Start by removing the gate from its position attached to the wall or post so that you can easily access all surface areas. Where this is not possible place an old sheet under the gate to catch any of the debris that comes off.
- Once the gate is off its hinges place the screws and bolts to one side for use later on. At this stage it is a good idea to make a note of what goes where to avoid any errors when refitting.
- Use a stiff wire brush along with abrasive paper work your way over the entire surface of the metal scrubbing hard to remove any loose paintwork and surface dirt. Make sure you get all the intricate areas or your efforts may be in vain.
- Once this has been completed wash the gate down using a mild detergent and water then rinse off and allow to fully dry.
- Take a cloth applied with white spirit and wipe down all the surfaces to remove any remaining debris and loose paint.
- At this stage the general condition of the gates surface should be clearly visible and is a perfect time to go to work on an rusted areas by applying a coat of rust removal paint (make sure you follow the instructions on the bottle for the exact process)
- Once the gate has been treated for rust it is now ready to be painted with a fresh coat of primer. When doing this make sure the area is free of dust and debris as any imperfections will show up at a later stage. For the best result apply a minimum of 2 coats leaving sufficient time between coats to fully dry thus preventing runs from occurring.
- Once the primer has dried it is now time to apply the first top coat. To achieve the best result work methodically around the surface making sure that all surfaces are fully covered including hard to reach areas and the bottom of the gate frame and set aside to dry once completed.
- Repeat the process another time and you are just about done.
- Provided the hinges and fittings that were removed are in a good condition they can be reattached and the gate can then be rung otherwise we recommend replacing them with new ones.
Now all that is left to do is stand back and admire your handy work and tidy up your tools so they are ready for use another day.